Game Development journey
Beginner "how to" tutorials , programming, software usage, artwork, news and more
Particles2D is a Particles Generator in Godot Engine. It's used to make all kinds of things where certain amount of elements need to be generated per given time frame at the defined position in Local or Global coordinates, have needed behavior and the level of its randomness.
Particles Generator can make things much easier when creating for example a snowfall, raining, fire burning, leaves falling, fogs as well as some nice effects in a game or as I'm going to demonstrate in this article - an Exhaust System.
A new Particles2D Object is created just in a few clicks with "Create New Node" UI window. As with all the other Nodes in Godot to add it to a project scene press '+' button in the Scene Tab or use CTRL+A combination.

A new window is going to pop up containing the list of available Nodes. The Search helps find the right one quicker so start typing "Particles2D" and you'll be navigated to the right spot within the list. Add Particles2D to the project Scene by clicking "Create" button.

Nodes can also be added to a scene with GDScript:
# Make a new Particles2D Node and assign it to particles variable
var particles = Particles2D.new()

# Adding particles as a child of the scene this script is connected to
func _ready():
   add_child(particles)
   # Turning on particles emitting
particles.emitting = trueIn order for Particles2D to work a new Particles Material has to be created under the Process Material property in the Inspector Tab.
Choose the Node in the Scene Tab, than go to the Inspector Tab and click on Process Material - create a new Particles Material. Once it's done click on the Particles Material for its properties to unfold.
The amount of options and settings the Particles Material is equipped with is huge and going through all of them in details would be a rather time-consuming process. Try changing properties values and observe particles behavior to have a better understanding of what they do. Many of the settings are quite self-explanatory but you always have an option to hover the mouse cursor over any property's name for its description to pop up.
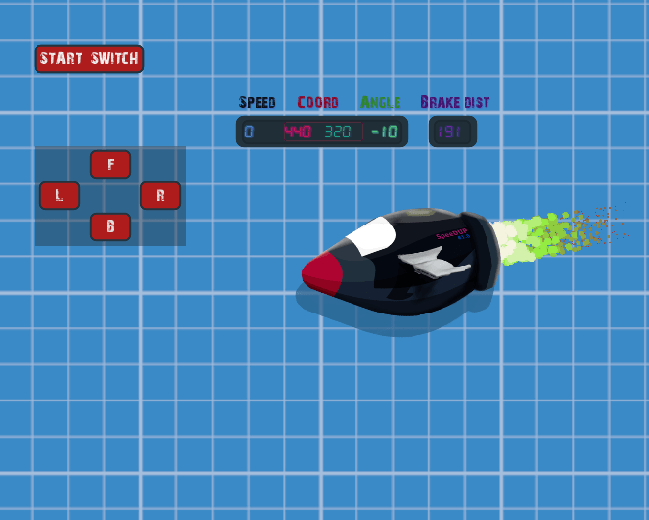
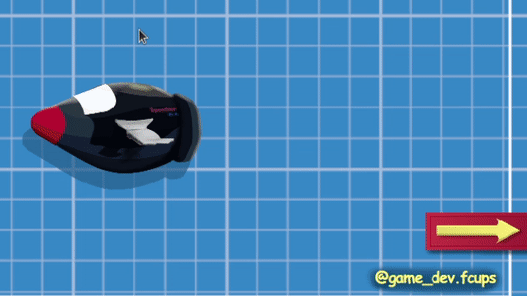
Working on a small project I made an acid green exhaust like flames using white circle shaped texture for a Player. It looks like this ( though the scene looks much better in the Editor):
The cartoon plane above with the greenish exhaust has a circle shaped particles emitted. Circles look smoother comparing to the default squares. I used an 8*8 px image of a white circle as texture in Particles2D properties. Place this image in the project folder then drag and drop it from there to Texture property located in Textures section of the Inspector Tab

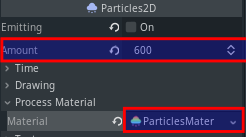
Here's my settings for Particles2D:
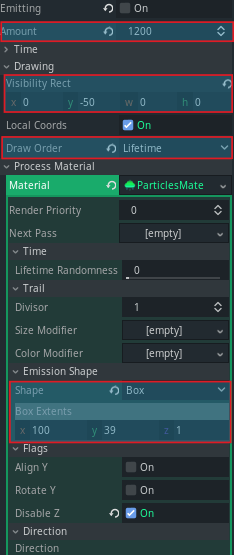

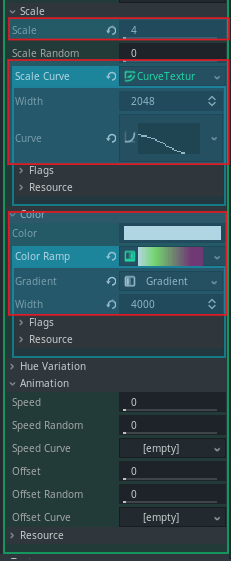
I've highlighted the properties I used but bare in mind that you might want to adjust them for your needs. As I was building a high velocity imitating thrusting system it was essential for particles to have:
By default particles are affected by Gravity. Applied gravity is easy to configure by changing gravity vector values or setting (0, 0, 0) in Gravity Section of the Settings to get rid of any gravity completely. The flames didn't need gravity so I change the default vector to all zeros.
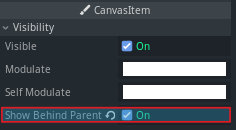
Adjust particles local position and rotation and if particles effect you are building has to be positioned behind its Parent - check Show Under The Parent checkbox under CanvasItem->Visibility.
A Child Node in Godot is usually shown on top of its Parent Node but for the cases like this one there's always an option for all CanvasItem Objects.

The flames now look like they are coming from inside this cartoon plane:
You can experiment with different properties of Particles2D adjusting them to suit your requirements.
There's another useful feature which can come in handy when making a multiple explosions scene for example or anything in Godot where each instanced particle will be animated independently with a sprite sheet . You just set random spawning within defined area and get nice multiple explosions.
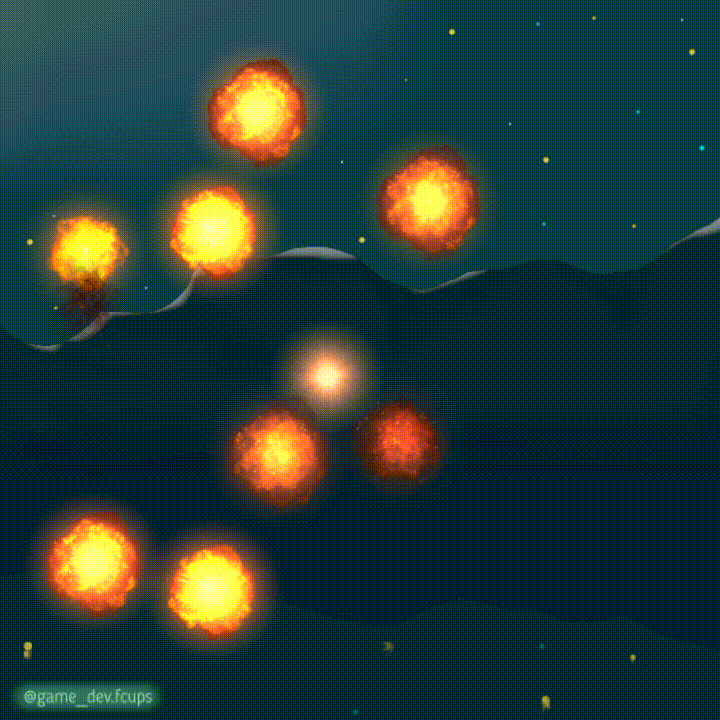
Drag and drop a sprite sheet in the texture property of Texture Section. Then scroll down to Material Section in Inspector Tab and add a new CanvasItemMaterial. Click on it for its properties to unfold. Check Particles Animation checkbox, set your Sprite Sheet's horizontal and vertical frame counts with Particles Anim H Frames and Particles Anim V Frames.

Remember to add a new ParticlesMaterial beforehand and set up its properties for animation to function the way it's supposed to.
That's it for today. You can join me on Instagram @game_dev.fcups where I also share Godot tips, drawings and experiments results that might be useful for those who's just starting learning game development.


