
Game Development journey
Beginner "how to" tutorials , programming, software usage, artwork, news and more

This website is my personal, I would say - journaling project. As I challenge myself to make something I'm not sure how to make at the beginning of the process, I learn a lot of stuff while building it: new Node functionalities, editor's interface, mathematical algorithms and functions, vectors... This is the place where I share what I know, have recently learned or understood about using the engine and gdscript. In this tutorial I'm going to guide you through a process of working with some Control Type Nodes and show how to build a sliding toggle switch that springs back when released and I will use a horizontal slider - HSlider Node for that.
CONTENT
I needed a Slider that works as a Switch. What it means is, normally when one releases a slider's grabber after it has been dragged, nothing happens - the grabber stays still and the user gets certain position dependent value between the max an min.
What I wanted though is a slider type Control with a draggable element - grabber, which springs back once released. So, the Switch will:
Check out this gif demonstration. This is what the result looks like.

By the way, check out my post about Godot Engine shortcuts. I repeatedly use some of them and it makes the working process much faster and easier. So I decided to make 2 cheat sheets and publish them here and on my Instagram.
Returning to today's topic, my plan was:


Starting off, in the newly created scene I add HSlider as a parent Node and rename it to "Toggler" , then I attach new script to it and save the Toggler.tscn scene.
To add a Custom Node to the Nodes list in Godot we have to use class_name MyName right below extends in the script file.
extends HSlider
class_name Toggler, "res://interface/TogglerIcon.png"
After identifying the name (Toggler in this case) you can put a comma and write Node icon's path (optional). That Icon will be shown in Godot's Nodes list pop up window. I used 18*18 png image.
Before explaining how I've built this sliding Toggle Switch I'd like to say a few words why I used HSlider Node.
HSlider inherits from Slider which itself inherits from an abstract Range class. Range has some properties one can assign to deal with a set of numbers between the min and max values. It also's got the current value (value) property. For example, while I'm dragging the slider's grabber the value changes and I can use it in my code every frame.
HSlider (horizontal) along with VSlider (vertical) both has exactly the functionality I need and otherwise would have to code from scratch - a draggable sliding element which movement affects the current value and the ability to change how that Control element appears, using a theme.
These Controls are quite similar with the main difference of the axis the engine uses for positioning their min, max and the values in-between. For this project HSlider was a better fit.
As I mentioned at the beginning of this post my Toggle Switch has to spring back when released, has 2 output values and snaps at some point - just like a physical switch. To turn a slider into that I have to extend (more like limit, though 🙂 ) the slider's behavior and using GDScript make:
var outputs = [0, 1]
var output = 0To imitate a physical spring effect that pulls back an element I need some acceleration system - numbers progression with a rate. For the usability purpose I exported the rate variable (multiply_accel) and the starting speed (accelerate) to be able to change them easily using Godot's interface.
export (int) var multiply_accel
export (float) var accelerate
Before writing a function that will actually pull the sliding element back to either of the sides I need to "instruct" Godot when the grabber's being drugged and when it's been released. I have to monitor its state under the _process() method, but there's no point to do so if I'm not interacting with the Switch. For that, I connect signals mouse_entered and mouse_exited to 2 methods:
func _on_Toggler_mouse_entered():
	is_input = true

func _on_Toggler_mouse_exited():
	is_input = false
To connect signals go to Toggler's Node dock, choose the signal, click "Connect" button and connect it to the method in the script file. These methods are called when the mouse cursor enters and exits the Toggle Switch slider area. HSlider is one of the Control Nodes and it responds to clicks, touches, dragging etc.
is_input variable value will trigger get_input() function. This function checks whether there's an input (click, touch) at the moment and also when it's been released:
func get_input():
	if Input.is_action_pressed(input_name):
		magnet = false
	elif Input.is_action_just_released(input_name):
		magnet = true
magnet variable is crucial here. It's used to build the Toggle Switch spring back functionality. While magnet is true and current value isn't equal to either min or max value the pull_back() method will be called until either of those conditions changes.
In practice, it means the slider's grabber's been released but it still hasn't reached the side it's going towards.
func pull_back():
	var multiplier = multiply_accel
	for i in range(outputs.size()):
		if output != outputs[i]:
			#The same as multipier = multiplier * (output - outputs[i])
			multiplier *= output - outputs[i]

	accel = abs(accel) * multiplier
	value += accel
Here I assign a value of the previously exported multiply_accel variable to the multiplier (don't confuse with multiplayer) to use it in this function. Then, I've got to find out the direction for the spring back movement. For that, I use the current output value of my Switch (0 or 1) and outputs array.
By using for loop I loop through the array comparing my output against every element, looking for the one not matching. Then, I subtract that element from my current output. I get either 1 or -1: 1-0=1, 0-1=-1.
multiplier multiplied by that result gets the right sign.
I could simply write something like down below and it would also do the trick (I hope 🙂 ):
var direction
if output == 0:
        direction = -1
else:
        direction = 1
multiplier *= direction
But with the loop and array it's more challenging. Finally, the actual spring imitating pulling back is done by adding or subtracting progressing accel variable to/from value property. value changes - so the position of the grabber until it reaches max or min value. It's controlled in _process():
func _process(_delta):
	#If mouse entered this runs
	if is_input:
		get_input()
		#Monitors the output considering
		#grabber's position and margin (snap point)
		output = get_arr_index(margin)

	#It runs while grabber's released
	#but hasn't reached the side
	if magnet and not value in [min_value, max_value]:
		pull_back()

	#After the pull back accel gets
	#its initial value from the exported one
	if value in [min_value, max_value]:
		accel = accelerate
output = get_arr_index(margin) line in the block above is very important. What it does is make sure the output value is always correct and by 'always' I mean - while I'm using the Switch.
'margin' might not be the perfect variable name in this case, but I used it at the beginning and didn't want to change it later. Just know - it's basically the snap point and it's also exported to make changing it more convenient:
export (float) var marginIts value is passed in as an argument of get_arr_index() but all the 'magic' happens inside the function:
func get_arr_index(input):
	if not typeof(input) in [TYPE_INT, TYPE_REAL]:
		return null
	else:
		if output == 0 and value > min_value + input:
			#if $OnBulb.modulate.a == 0:
				#$APlayer.play("on_off_animation")
			return 1
		elif output == 1 and value < max_value - input:
			#if $OffBulb.modulate.a == 0:
				#$APlayer.play_backwards("on_off_animation")
			return 0
		else:
			return output
Don't mind the commented out lines for now. They will be used later. The if statement at the beginning makes sure the input is either integer or float number if it's not - the function returns null (nothing, in other words). Otherwise, if the argument passes the data type test, else part is executed.
Under else there's if-elif-else conditional statements. The last else just returns the current output value. if and elif check whether the sliding element has passed the snapping point while moving farther away from the current side (just like with the real toggle switch or whatever its technically correct name is 🙂 ). If the condition is true, the output switches and the right number gets returned.
Then, under _process() that value is assigned to output variable and, as I explained earlier, with the output switched the side to which the grabber will be pulled to when released also changes to the opposite one. That's how it works, guys. Now let's make it look nicer.
Make a new Scene and add Node2D as a root Node. I named it 'App'. Next, add Toggler - Custom Node you saved in the Nodes list - as a child of App. Depending on your needs you might want to add any other Node you want to make that Scene look and function the way you imagine it to, but I just wanted to have:
My Scene tree looks like this:

As you can see I added 4 child Nodes to Toggler - 3 Sprites and 1 Animation Player. In my main resources folder I create new folder - sprites and upload the images I need to this folder:

You may download archive with the sprites here.
OuterBG.png will be used for BG Sprite Texture property and Bulb.png - for OnBulb and OffBulb Textures. To set the textures, choose Sprite Node you want, then drag and drop an image onto the Texture property in Inspector:

At this point if you've followed through, you most likely have all those images overlapping and positioned in the center of Coordinates system. That's how it should be. One of those textures will be a background to play the role of that outer light/shadow and another two will serve as the lights turning on and off when the switch toggles.
There's a quick way tho change the slider's appearance. In Inspector find Control subcategory, there's Theme Overrides section where you can find Icons and Styles subsections with the lists of properties.

For Grabber, Grabber Highlight and Grabber Disabled use Slider.png. Click on [empty], select New AtlasTexture then drag and drop the image onto that texture resource. Or you can just drop it on [empty] without bothering creating the texture and it will be created automatically.
Under Styles there are Slider, Grabber Area and Grabber Area Highlights. The second and the third are the background of the area to the left of the grabber, where as Slider is the background for the whole slider. Any of these can be set transparent with assigning New StyleBoxEmpty to them or New StyleBoxTexture to override the default styles using custom image. I needed just the background for this UI Switch, so for 2 states of Grabber Area I used StyleBoxEmpty resource and as a texture of StyleBoxTexture for Slider I assigned BG.png picture.
It's a quick setup which you can use for each UI Type individually without diving into the whole custom theme tweaking. However, if the projects requires having more consistent user interface appearance then you would want to make a custom theme using Theme Panel. Check out this tutorial on how to make custom theme in Godot.
If you still haven't positioned all the Nodes at the right coordinates do it now by selecting Move Mode (press W or click  button on the upper central panel ), then click on Nodes in the Scene dock and move the textures on the screen by grabbing and holding them with LMB. Another way is to set (x, y) for each of the Nodes in Inspector panel. For Sprites:
 Node2D/Transform/position; for Control inherited Nodes: Control/Rect/position.
The Switch should work properly now. The follow up part is for those who want to make an extra effort and add some visual indication of ON and OFF state for the switch as well as learn how to deal with animation - adding animation, tracks and playing them with GDScript.
Animation Panel gets open when you click on AnimationPlayer Node (APlayer) in Scene dock.
I wanted to use 2 bulb images for ON and OFF indicators - just like in some real physical switches - you know. The Sprites have to be positioned at the proper coordinates. So the idea is simple - one of the light is always on. As there are 2 Sprites involved I need 2 tracks in my animation, but first I have to create an animation resource. To do so, click on Animation on the panel's top panel and choose New:

Name your new animation on_off_animation. Now click on OffBulb Sprite and find modulate property under Visibility. There's a key sign next to it. After clicking the key a pop-up will ask to confirm new track creation. Do it - the track appears in Animation panel. Find animation time settings 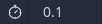 , and set it to 0.1 seconds.
Drag animation slider to the end of the track (0.1 sec).

Go to modulate property again but this time click on the white color rectangle that activates color settings. Set Alpha property (A) to 0 to make the sprite transparent, then add second keyframe by clicking the key sign again. Repeat the process for OnBulb Sprite but with the reverse transparency.
You might animate self-modulate instead of modulate. The difference between the two is that the changes of self-modulate doesn't affect Node's children.
After setting up animation you should have 2 tracks for 2 Sprites with 2 keyframes each. If you drag the slider it'll toggle each sprite transparency states so every time there's only one light active.
Now it's time to use GDScript to play our animation at the right time. That's what those commented out lines of code were for. Uncomment them now. The animation player plays the same animation forward and backwards depending on the Toggle Switch output.
func get_arr_index(input):
	if not typeof(input) in [TYPE_INT, TYPE_REAL]:
		return null
	else:
		if output == 0 and value > min_value + input:
			if $OnBulb.modulate.a == 0:
				$APlayer.play("on_off_animation")
			return 1
		elif output == 1 and value < max_value - input:
			if $OffBulb.modulate.a == 0:
				$APlayer.play_backwards("on_off_animation")
			return 0
		else:
return outputI'm very happy with the result, achieving what I intended to - a spring back toggle switch which resembles a physical unit in appearance and functionality, as well as outputs two values for its states so it can be toggled from outside or it can activate some outside functions depending on these output values.
Ask any question in the comments below if there's something confusing in the text - I'll be happy to help.
I hope this tutorial was helpful as more is coming soon. I'm currently working on the one about Transformation Matrices and their use in game development (especially in Godot), so stay in touch guys.
If you find this article useful, follow me on Instagram for more tips and learning materials.


