
Game Development journey
Beginner "how to" tutorials , programming, software usage, artwork, news and more
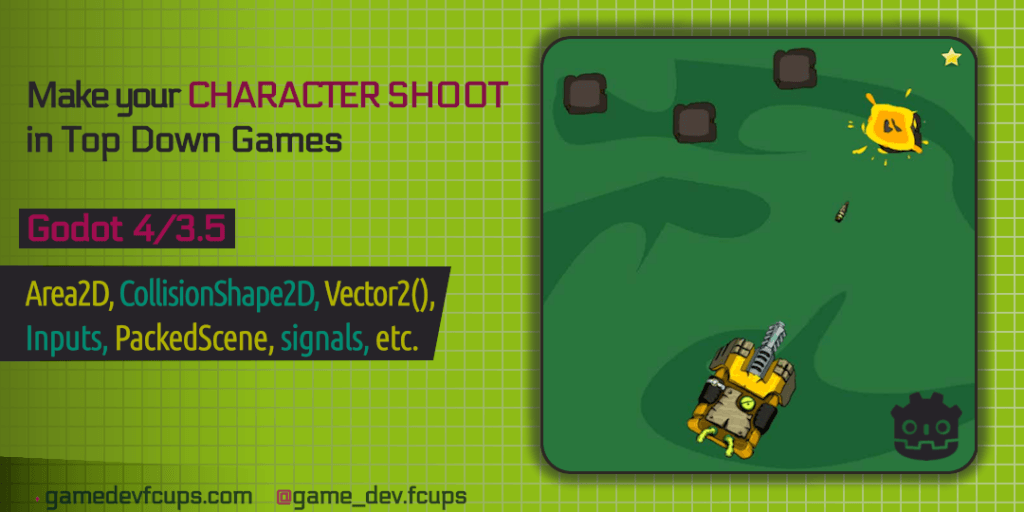
Today's topic is how to build a basic shooting system in Godot Engine for Top Down style Games. I'm writing this for version 4, but I'll emphasize the differences with 3.5 when such occur, so this will be suitable for both.
Games might have all sorts of characters which are able to shoot things wherever they can or like, but in the classic Top Down style we're more likely to have a need for shooting in all directions whereas in Platformers it's often enough to have a straight line or even axis aligned shooting trajectory. In the nutshell, they're all straight lines, it's the direction that matters.
I'm writing this tutorial with the assumption you already have a project created in Godot at least with a player scene. The player might not move or do anything - it doesn't matter. It will be able to fire anyway and the bullet's (missile, arrow, rocks...) trajectory will be based on the player's rotation. Just like it has to be.
Check out the footage from my project. There's also an explosion animation added when bullets hit rocks. I'm currently working on another tutorial on how to make explosions or bullets holes upon contacts and it might be also useful for a better understanding the whole process of colliding, signaling and using nodes instancing.

CONTENT
First thing we have to do is to make Custom Input Action in the project setting. You can use the default ones - "ui_space", for example, but people say it's a good practice to make a custom one and who am I to argue :-).
Go to Project - Project Settings in the editor's top menu, then click on Input Map tab. There's a text field with Add New Action placeholder attribute (Action: to the field's left side in the previous engine version ). Click on it and enter your action name like shoot, for example.

Click Add. A new action will appear in the list underneath. To attach a key (Event) to that action, click + on the right side:
Godot 4: Once a window with events settings appears you can just press the key you want and confirm with OK button. You may also explore window settings and assign a key using provided options.Godot 3.5: Select the type of key in the list (Physical Key or just Key for the keyboard), press the key and confirm with OK.
First thing's first, let's list the actions required to make the bullet appear at the right position when the SPACE key is pressed:
shoot() function to hold the signal sending and other possible actionsAdd Marker2D (Position2D) node to your player scene and locate it at the position where you want whatever player's going to be shooting to appear - at the muzzle end for example.
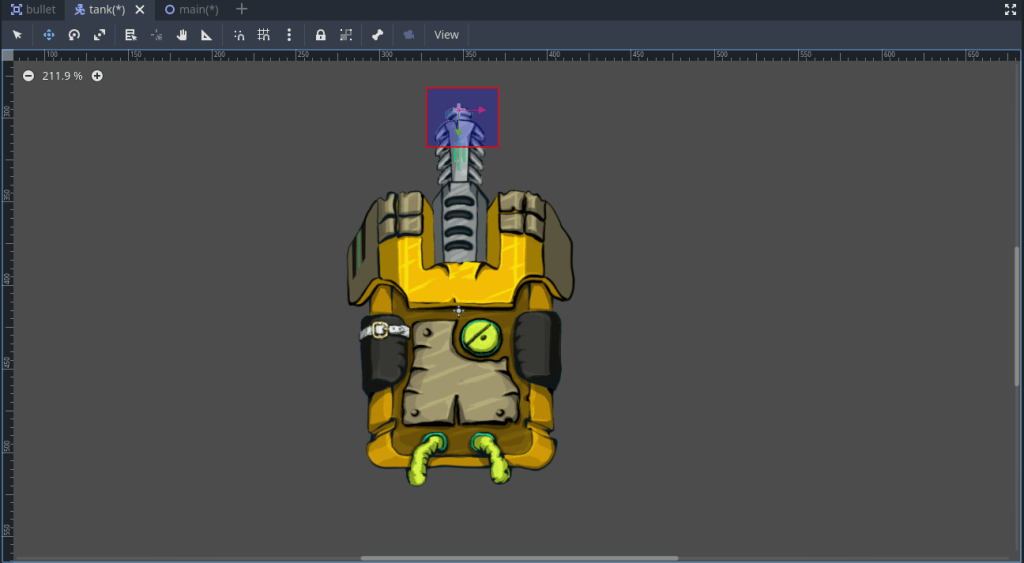
If there's still no script attached to the scene - attach one using attach/detach button at the top of Scene dock  . Go to the script editor (Script button on top or Shift+F3). Underneath the first line (
extends) declare a new signal and shoot_marker variable using @onready (onready in Godot 3.5):
signal shooting
@onready var shoot_marker = $BulletSpawn
Now that signal appears among others - the default ones, which your player can send (emit). To check them, go to Node dock. You'll see something like this:
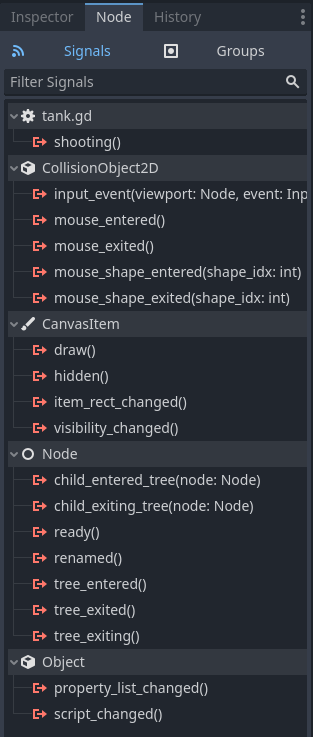
In GDScript we create new variables with var my_var = "some value", but if that variable is going to hold reference to node, as well as something in the node we put annotation @onready/onready before var to make sure it's assigned once the node is ready.
Next thing to do is to make a new function that will actually send the signal with 2 additional arguments: Marker's global position and my player's global rotation:
func shoot():
	emit_signal("shooting", shoot_marker.get_global_position(), get_global_rotation())
Signals in Godot are sent with emit_signal() Object Class' method where the first argument is a signal name (string) and the rest is other data we need to attach to that signal, so we can use them constructing the response or other actions afterwards.
The last part of this section is managing the input. My input key is SPACE. Godot deals with inputs using Input Object. Simply put, if input event happens, Input knows about it. The input event's got a name attached to it - "shoot" - the one assigned in Input Map. Using this name I can check various states of an input with the Input methods. For example:
Input.is_action_pressed("shoot") - will return true every frame while the key is pressedInput.is_action_just_pressed("shoot") - returns true only once when you've just pressed the key, but if you hold it the method will be returning false. The last - is the one you need for your player to fire bullets one at a time. You can also achieve similar result with the first one by using Timer.
Under your _process() method write this piece of code:
if Input.is_action_just_pressed("shoot"):
	shoot()
Now let's make the Bullet Scene.
You might have any type of ammunition in your game - bullets, missiles, bombs, arrows, rocks, balloons, paint balls, etc., the basic techniques to make each of them fly in certain direction would be similar:
Bullet scene is going to be Area2D with several children:
CollisionObject2Ds)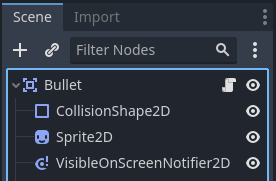
Area2D inherits from CollisionObject2D Class therefore it needs to have a shape for detecting collisions with other objects of this kind.
So, first I drag and drop Bullet image from my OS folder to FileSystem dock:
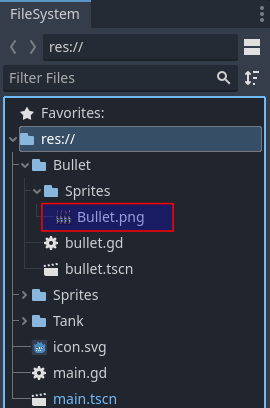
Then I click on my Sprite2D and do the same - drag and drop that image from Godot's FileSystem dock onto the Sprite's texture property value:
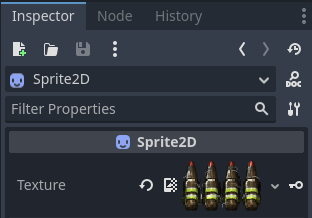
I use rotation animation, that's why my texture is a frame sheet, but it could be just one of those 4 frames.
Now when I have a visual where my shooting bullet's boundaries are I'm going to add the collision shape. CollisionShape2D is an Object with shape property. This property must have a proper value for collisions to be able to work. Its value is one of the possible Shape2D resources: CircleShape2D, RectangleShape2D, CapsuleShape2D, etc.
To add a shape go to Inspector, click on empty and select one of the shapes in the list. To resize the shape after it's been added, go to Select Mode by pressing Q key or click the Arrow button in the Instruments menu (W - move, E - rotate).
Add a new script to the scene. Click on VisibleOnScreenNotifier2D (VisibilityNotifier2D), go to its Node dock and choose screen_exited() signal then press Connect button at the dock's buttom. A window appears with Button Node selected as a signal receiver.
You can connect a signal to any node with a script. Signal's response must be written in a function and to make a function we need a script file.
Click Connect and Godot will make a new function. Node can be "killed" with queue_free() Node Class method:
func _on_visible_on_screen_notifier_2d_screen_exited():
	queue_free()
It works like this: Bullet's been fired after shooting, it flies wherever its direction is and once it leaves the screen the signal gets sent which executes the function and frees the object.
Think about the process of how any object moves in coordinate system. Basically, it's nothing more than just a simple change in position - (X, Y).
To transform (move) the bullet or any other object the Engine needs to assign the new coordinates every frame. Godot, like probably many other game engines and software that deal with 2D or 3D, implements Transformation Matrices into its objects upon creation. It means that my bullet's got its own Local coordinates and it makes sense, because any object I'd want to add as its child needs a position in parent's coordinates.
Let's think about in what system the fired bullet should exist. Player makes a shot. The bullet appears at the muzzle end and starts moving. If I add that bullet as a child of my player object, then suddenly decide to change player's angle and shoot another one, I would notice how the position of the bullet that was fired first, also gets shifted. Obviously, that's not what I want.
What I want is for all the bullets to exist separately from Player after shooting, therefor I have to "host" them in my Main Scene or Game World.
Every bullet's .position property would refer to Main scene's coordinates or, just for organizing purposes, there'll be a dedicated Node2D container (direct child of Main) hosting all the bullets and they'll refer to that container coordinates.
Considering everything mentioned, to make transformation from point A to point B I need to:
I start by exporting speed variable. In Godot 4:
@export var speed :intIn Godot 3.5:
export (int) var speedSpeed now can be changed using Inspector dock. It's usually located at the top. In the property field type in 1000.
Next, I write a new function in the script:
func start(my_position, my_rotation):
	position = my_position
	rotation = my_rotation
This function has 2 arguments. When the function is called with those arguments passed in, the code inside the function assigns them as node position and rotation at the moment it appears (or whenever start() gets called again).
I can also make sure the data passed through those arguments will be of the right type like this:
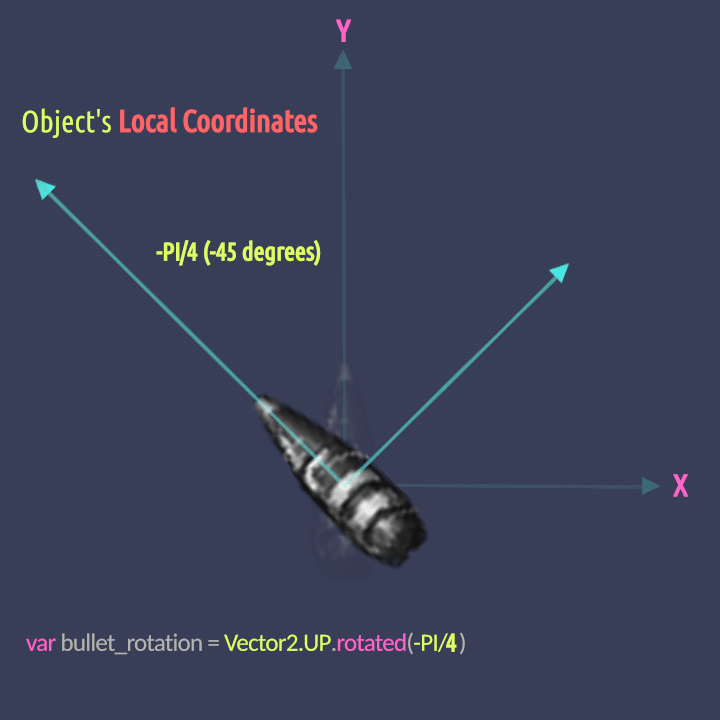
(my_position:Vector2, my_rotation:float)In the picture below you can see that if I get Vector2.UP (pointing up), for example, then rotate it by certain angle - in this case, by the bullet or player rotation - I will get a different vector with the new coordinates pointing towards the direction the object aims. It can be used to calculate new coordinates for every frame.
Create new variable in the bullet's script.
var direction = Vector2.UPVector2.UP equals to Vector2(0, -1). UP - is one of the constants the built-in Vector2 Object has. Other constants: LEFT, RIGHT, ZERO... You got the idea.
In start() I've already assigned bullet's rotation in accordance with Player rotation. Now, I can use that angle to adjust directional vector. If I rotate Vector2.UP by the rotation of my bullet object I'll still get a one unit vector but with different coordinates. For example, Vector2.UP rotated by 90 degrees (PI/2 radians) gives Vector2.RIGHT or (1, 0) and if I we continue, we'll get - DOWN: (0, 1), LEFT: (-1, 0).
Vector2 Object has a method to perform rotation - rotated(angle_in_radians). It has to be made under the _ready(). I get bullet's angle and use it to define the direction:
func _ready():
	direction = direction.rotated(get_rotation())
After this in _process() I execute the transformation:
func _process(delta):
	position += (speed * delta * direction)
delta is the time passed (in seconds) since the previous frame. This amount may vary from frame to frame and it makes sure the movement is smooth and the length in pixels an object travels per one second (speed) is the same.
With that the bullet's ready. Now let's move on to Main Scene.
In the main Godot menu click Scene/New Scene. Add Node2D and rename it as Main. Click on it and then click on the chain button at the top of Scene dock to instantiate player scene as a child of this one.

Choose player scene from the list.
Let's also add a container to hold all fired bullets. Add a child node (Node2D) to Main and rename it as Bullets.
Unlike player which will exist in one instance during the game play and its position will depend directly on input events, there'll probably be many "copies" of a bullet and they will be added to Main on request.
PackedScene resource provides a simplified version of a scene file that can be instantiated and added to a scene as a node later. PackedScene of the bullet can be added directly to Main but if the player has several choices what to fire with different textures it's a good idea to transfer the right one with shooting signal.
In the player script file export a new variable of the PackedScene type (Godot4/Godot3.5):
@export var bullet: PackedSceneexport (PackedScene) var bulletGo to 2D Mode.

Drag and drop bullet.tscn from FileSystem dock onto Bullet exported variable value field in Inspector dock.
By the way, packing can be made with .pack() method in script:var new_scene = PackedScene.new()new_scene.pack(node_to_pack)
Now, add bullet as another argument to the emitted signal. The code now looks like this:
func shoot():
emit_signal("shooting", bullet, shoot_marker.get_global_position(), get_global_rotation())Add a new script file to Main than click on Player (in Scene dock) and go to Node dock. Connect shooting signal to the script but this time choose a new name of the method signal's going to be connected to. Notice Receiver Method field at the bottom section of the Connection Window:

Enter a function name in the field. bullet_spawn, for example and press Connect.
bullet_spawn() will be called when shooting signal is emitted. The signal sends additional 3 arguments - bullet's PackedScene, Marker2D position and player rotation, therefore bullet_spawn also has to be able to receive those and use them. Add spawn_pos, spawn_rot between the parenthesis:
func bullet_spawn(object, spawn_pos, spawn_rot):PackedScene in Godot 4 has instantiate() method that basically creates ready to be added node out of PackedScene resource. The same method in Godot 3.5 is instance().
After instantiating I need to call start() inside a newly created bullet node with spawn_pos and spawn_rot passed as arguments and finally bullet is added to Bullets Node2D with add_child():
func bullet_spawn(object, spawn_pos, spawn_rot):
	var b = object.instantiate()
	b.start(spawn_pos, spawn_rot)
	$Bullets.add_child(b)
You may run the current scene with F6 or press F5 to run the Main scene and if it hasn't been assigned yet, Godot will ask you to choose one. Choose main.tscn. Read more about Godot editor shortcuts here.
This is it. If I've missed something or you have any questions, please write them in the comments down below.
This is one of the ways how to shoot in top down game in Godot. I'm sure there're might be some different options how to calculate angles, for example, but overall there's the same principle on execution - make connections between game objects with signals and prompt them to do something using functions.
Shooting can be much more complex: we can change bullet's speed and texture depending on the weapon the player uses, set timer between single shots, have ammunition limits - different for various guns, etc. Actually, there's no limits. Improvise!
If you find this article useful, follow me on Instagram for more tips and learning materials.


