Game Development journey
Beginner "how to" tutorials , programming, software usage, artwork, news and more

In Godot 4 Engine we can draw different objects and make them appear on the screen the way we like or need. It's possible to make something as simple as a line or a circle which basically require a few lines of code but there's actually tons of various shapes or even unclassified entities that can be drawn with the help of the Godot drawing methods and a pinch of imagination.
CONTENT
draw_line() method
draw_arc() and draw_circle() methods
draw_string()In the Engine every 2D object appears on the Canvas. What it means is that everything 2D inherits from CanvasItem Class which holds a lot of basic functionalities required by the things we want to show in our imaginary world.

The drawing methods belong to CanvasItem Class, therefore they are accessible from any class deriving form CanvasItem. In simple words - any 2D object can draw, starting from Control and Node2D (CanvasItem is an abstract Class and can't be added directly to the project), down to some very specific Control Nodes, like HSeparator for instance.
In Godot documentation of CanvasItem in the class methods section there's _draw()method. The documentation can be found online and it's also accessible from inside the editor :
press F1, in the search field type in what you're looking for and press ENTER.


This is a virtual method. It mean it can be overridden and given various additioanal functionalities, thus it can produce different outcomes in different objects.
By default, _draw() doesn't do much. To make it draw something we need to add a specific drawing function in it so when it gets invoked we see the result on the screen. You can find these functions and their description in Godot documentation. Also, you may want to check out this custom drawing tutorial.
Just like this, by placing _draw() in the script file attached to an object and by using drawing function we can make that object draw things we need in our project. It's worth noticing that _draw() will be called once if we don't make the engine to redraw with queue_redraw() function (update() in 3.5).
Let's take the draw_line() as an example. It takes several arguments needed to define what kind of a line's going to be drawn.

The first 3 arguments are essential for the method to work. from and to are the coordinates passed in as vectors. They define where the line starts and where it ends. The third argument is the line color.
Colors can be generated in multiple ways. One of them is by using Color Class constants (find more in documentation). Color.CRIMSON creates a new color object of a specific color. Other more obvious examples are Color.BLACK and Color.WHITE. These make black and white colors.
The last 2 arguments have default values which means the function will work using those defaults if we don't pass in anything. width is self-explanatory - it's the line width, and with antialiased set to true the drawn lines will be smoother.
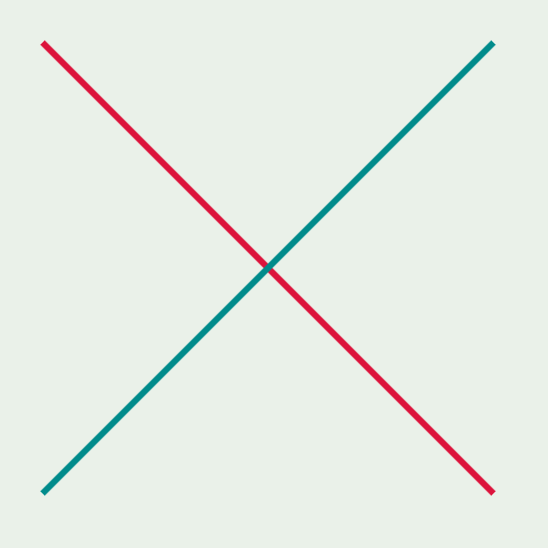
Here's an example of how to draw 2 lines crossing each other.
func _draw():
	draw_line(Vector2i(50, 50), Vector2i(500, 500), Color.CRIMSON, 5, true)
	draw_line(Vector2i(50, 500), Vector2i(500, 50), Color.DARK_CYAN, 5, true)
In Godot 4 we've got Vector2 and Vector2i classes which are used for floating point and integer coordinates. I didn't need floating numbers for this demo, so I used Vector2i for integer coordinates. The line width was changed to 5 pixels. Here's the outcome:
This is one of the most simple demonstrations of how to draw in Godot 4 using drawing methods. Now, let's move on to more complex things like circles, arcs and strings.
(You may also check out my recent tutorial on how to build a shooting system in Godot).
Take a look at this demo:
The program gradually draws one by one:
The grid consists of horizontal and vertical lines. The circle coming next is just an arc with 360 degrees angle. The arc drawing is led by a small gray solid-colored circle. After them the text appears in the bottom right corner.
As I mentioned earlier, the drawing methods should be placed under _draw() virtual method. _draw() and its content get processed after NOTIFICATION_DRAW received by the engine. The content of the method is cached , so typically objects appear when we run the project and the drawing methods don't processed every frame, but we can use queue_redraw() method to request Godot to execute the function if certain conditions are met or even every frame if it's placed straight into _process(). This allows us to make changes to already drawn objects or make new ones. It also helps to create the kind of animation effects you can see in the image above.
Speaking about animation, I have another animation related article - How to make animation with AnimatedSprite2D.
draw_line() methodAdd Node2D to the project and attach a script file to it. Let's define several variables at the beginning of the script file:
# Grid variables
var hor_length = 0
var vert_length = 0
var step = 60
var speed_fraction = 2160
hor_length and vet_length will be getting gradually increased until certain length. The grid will be redrawn using those increased numbers. step is the distance between the lines in pixels, speed_fraction will be used to increase the line length.
I also need to get my screen size to know where to stop drawing lines. Add another variable to the script:
var screen_size: Vector2It's an empty variable with Vector2 type. The value will be assigned in _ready() using get_viewport_rect() method.
func _ready():
	screen_size = get_viewport_rect().size
size is the property of Rect2 object which get_viewport_rect() method returns. The property contains X and Y coordinates as Vector2 object.
Make a new function with func grid():. Later, it'll be called a child of _draw() and it'll be containing script for drawing lines. To draw in Godot 4 I have to place them directly into _draw() or in its child method.
func grid() -> void:
	# Figuring out how many lines will be drawn
	# position + step multiplied for positioning lines along x & y axis
	for i in range(int(screen_size.x/step + 1)):
		var new_line_start = i*step

		# Limiting lines length to the screen size
		if hor_length >= screen_size.x and vert_length >= screen_size.y:
			hor_length = screen_size.x
			vert_length = screen_size.y
			#if not circle_on:
				#circle_on = true

		# Adding speed fraction to the line length
		else:
			hor_length += screen_size.x/speed_fraction
			vert_length += screen_size.y/speed_fraction

		# Drawing
		draw_line(Vector2i(new_line_start, 0), Vector2i(new_line_start, vert_length), Color8(0, 0, 0, 30), 1, true)
		draw_line(Vector2i(0, new_line_start), Vector2i(hor_length, new_line_start), Color8(0, 0, 0, 30), 1, true)
for...in statement calculates how many lines will be drawn with each line positioned at i*step coordinate along X and Y axis.
For the demonstration purpose I didn't bother to make a precise grid that wouldn't exceed the viewport rectangle, that's why if the screen's orientation is horizontal some lines might go under the bottom edge of the viewport. It's not a big deal in this particular case, though the memory's still used. So, for the real project it's better make the grid of the size of the screen whatever it might be.
With the defined step I simply took the bigger side, divided it by step, added 1 and made the result integer: screen_size.x/step + 1
if...else statement does all the work controlling the grid size - either adding to the lines length or assigning screen_size coordinates values if they start exceeding the screen bounding box.
Once hor_length and vert_length reach screen_size.x and screen_size.y respectively they don't get increased anymore so, when grid() method gets invoked next time, the drawn grid stays the same.
I also would like the program to start drawing a circle (demo) when it's done with the grid. I need a boolean variable for that with its value switching from false to true once the grid is done. Add var circle_on = false at the top of the script and uncomment these two lines of code in the grid() method:
if not circle_on: and circle_on = true
Add _draw() to the script and add grid() method under it:
func _draw():
	grid()
Now, call queue_redraw() in _process():
func _process(delta):
	queue_redraw()
Run the scene (F6) and see if it works.
draw_arc() and draw_circle() methodsI'm going to use draw_arc() method to gradually draw Arc until it becomes a full circle. It'll also have a small colored circle at the end of the arc line which will be orbiting the arc center until it makes one full lap.
Declare a new end_angle variable at the top or the script file:
var end_angle = 0.0For the next stage when the text appears we also need another boolean variable holding false value:
var text_on = falseLet's make a new circle() method:
func circle():
	# Making sure end_angle stops at TAU (360 degrees)
	# Turning on the Text
	if end_angle >= TAU:
		end_angle = TAU
		if not text_on:
			text_on = true

	else:
		# Adding to the Arc angle
		end_angle += get_process_delta_time() * (TAU/6)

	# Drawing Arc
	draw_arc(Vector2(600, 300), 200, 0, end_angle, 128, Color8(0, 0, 0, 200), 4.0, true)
	# Drawing colored circle
	draw_circle(Vector2(Vector2(600, 300) + Vector2(200, 0).rotated(end_angle)), 10, Color8(50, 50, 50, 150))
This method adds up to end_angle until it reaches TAU which is the constant in radians equivalent of 360 degrees. Once it's equal or bigger than TAU (or 2*PI) it will be assigned TAU's value for the circle to remain the same (though the arc method works in a way that it won't overlap itself if the angle is greater than TAU), then text_on becomes true.
get_process_delta_time() returns time passed in seconds (delta) since the last process callback. I multiply its value by one-sixth of the full circle and get some small number to add to my end_angle variable every frame. This number depends on delta - the bigger the delta, the bigger the number, so if it takes longer to process the program adds bigger angle to the arc.
draw_arc() and draw_circle() methods workYou might want to check out Godot's documentation to learn more about arc drawing and circle drawing. In this particular case colored circle position directly depends on the arc's end_angle.
draw_arc(center, radius, start angle, end angle, point count, color, width=1.0, antialiased=false)
The last 2 arguments have default values. The first six are necessary for the function to work. In the script above in the circle() method every time draw_arc() is called all the arguments except for the end_angle stay unchanged. end_angle goes from 0.0 to TAU and stops.
Meanwhile, draw_circle() also gets executed. This method has 3 arguments:
draw_circle(position, radius, color)
It draws a solid color filled circle with the radius and at position passed as an arguments. The challenge here is to change its position every frame in a way that it orbits the center of the Arc. To achieve this I take the arc center (coordinates Vector2(x, y)), add a new vector to it with the length equal to arc's radius and rotated by end_angle. The result of this operation provides coordinates for the draw_circle() position:Vector2(Vector2(600, 300) + Vector2(200, 0).rotated(end_angle))
rotated() is Vector2 Class method which rotates current vector by the given angle in radians.
At this stage Godot draws grid (lines), arc and circle and with the queue_redraw() method it all looks like animation.
draw_string()The final element is the watermark text which appears in the bottom right corner. This is the easiest part among the three. I won't even need a separate function for it, but I'll make 2 exported variable for the Font and for the String of text:
@export_category("String Drawing")
@export var text: String
@export var font: Font
@export_category("String Drawing") line creates a new category in the Inspector dock.
Now I have a new String Drawing category holding 2 variables - font and string. Drag and drop the font file (I used ttf font) from a folder to Engine's FileSystem dock and then onto the font's value empty field, then write the text you want next to the text property name.

Add the following if statement into the _process() method:
if text_on:
		draw_string(font, Vector2i(screen_size.x - 200, screen_size.y - 20), text, 0, -1, 22, Color.INDIAN_RED,3, 0, 0)
When text_on becomes true the script under it gets processed.
draw_string(font, position, string, alignment, width, font_size, modulate, justification_flags, direction, orientation).
font, position, string, font_size and modulate are the arguments I needed for the method to work as I intended, the rest got the default values.
Making simple shapes and coding the way they appear on the screen can be a great way to learn how to draw in Godot 4 using drawing methods. Every method I've covered in this tutorial is just a function doing certain programmed action, therefore it's much more important to understand how the engine deals with drawing process that's why I explained some of that in the first part of this article.
I've used 4 methods for this project: draw_line(), draw_arc(), draw_circle() and draw_string(). I also emphasized the importance of knowing how to apply queue_redraw(). To continue this topic, in the near future I'm going to write another tutorial on how to code a dynamic behavior using draw_polygon() method, where a user can manipulate shapes creating a nice colored gradient effect.
Meanwhile, you can follow me on Instagram for more tips and learning material.


